Monday 24 October 2011

Finals

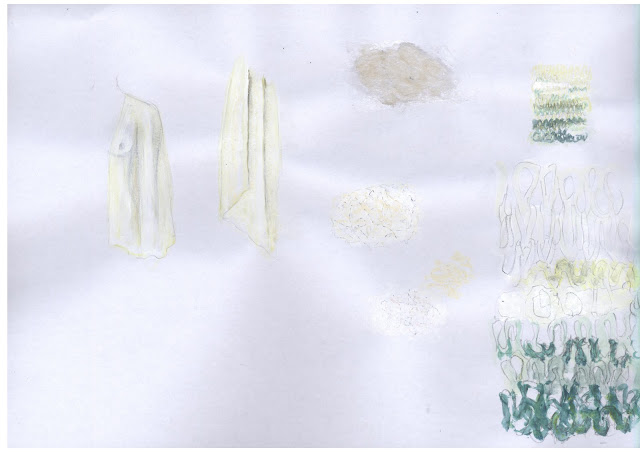
Here are my finals! Im still trying to upload some of them and am not sure how to put up the pages from my rage book as its all in pdf for printing...will upload a rushed picture of the final book and swatch/colour book soon x


Mood Board
Illustration 1

Illustration 2
Illustration 3
Illustration 4

Details Board
Range Plan Book

Swatch colour book


Thursday 20 October 2011

Working on mood boards and features

Working on mood boards and feature board, feature board looks crap at the moment and im finishing ti hard keeping in touch with all my files. want to incorporate more scenery into my boards.

Wednesday 19 October 2011

Garment Names

Intimates:
2 piece set (web fabric) = Dream catcher set
3 piece set (garter belt 1) = Hazy afternoon set
2 piece set (singlet and shorts)= Morning dew set

Corset= Bound in Memory Underbust Corset
Nighty= the quiet dawn negligee

Hosiery:
Slippers= Sleep walker slippers

Pull string socks= Holding On Socks
rolled down socks=Foggy Paddock socks
Chin socks= The Pine Song socks

Over the knee tights= over the knee frill edged stockings
Thigh high tights= Hollow bones Thigh High Stockings

Tops:
long sleeve sholder hole top= The Willow Walker top
lose hole top= Hollow bones crop top
Pulled knit singlet= Sleepy knit singlet

Bottoms:
Knit shorts= Summers End Shorts
Shorts/tights combo= The Inbetween Tights
Fisherman pants= The Lonely Fifshermans Pants

Outerwear:
Kimono wrap= Calm Waters Kimono
Kaftan wrap= Silk Caftan Cape

Shawl= Forget-Me-Not Shawl

Oversize, pull cord knit dress= Oversized Knit Dress
Knit wrap dress with shoulder holes= Moss wrap

Accesories:
plain sleeping mask= Simple Sleeping mask
Frill sleeping mask= Frill Sleeping mask

3 string felt necklace= Winters pearls 3 string necklace
2 string felt necklace= Winters pearls 2 sting necklace

felt cap=
bennie= Cold Draft Bennie
turban= Nomands Turban
scarf hat= Working Scarf hat


Tuesday 18 October 2011

Words for garments

Thinking of words I might want to use to name my garments.
I want to incorperate words to do with the memory, age, decay and perhaps a bit to do with travel (due to the oriental vibe of my collection). Also perhaps words that conquer up memory.

foggy
dipped
silent
wondering
still
nomad
echo
dim
somber
murk
overcast
sullen
mute
calm
nebula
misty
veil
dissolve
Mare's tail??
dilute
amalgamate
taint
haze
Illution
impresssion
trace
consious

retain
keep
treasure

decay
break
lose

Sleep
lounge
nap
faint
reflection


1st illustration started

Just working in photoshop on my first illustration. Incorperated some of the imagrey from last assignment (burnt holes) was thinking of putting my fabric swatches inside of these but it doesnt really show up. I feel soemthigns a bit off with the layout and balance. Loving bits of it tho...jsut keep working

Almost finished Line up

Almost finished the line up! I just need to add text. I decided to use a photograph for the background as I found with my last assignment that when hand rendering everything it became very disconnected with reality. Also these girls wouldn't be seen trudging up a mountain I think the quiet, serene yet slightly degraded landscape fits perfectly with my theme and is in fact one of the original images I was inspired by. I used this image on my mood board however ti was tiny because I couldn't find a larger version, but now I will put it on mood board and blow it up as to eliminate the harsh edges. I think the way the models are slightly overlaping adds to the textural and layering aspect of this collection. Feeling a little better abouts this assignmetn now. Now jsut need to bang out illustrations and continue Range book + make material swatch/imagery book (fabric/colour board) and details board...then complete samples..ekkk

Line up almost complete


Range Plan in photoshop

Its getting really hard to keep up with blogging when there is so much to do!
Here is a screen shot of my range plan so far. Im using photoshop as I dont know how to use indesign or anything. Have put in some guide lines which took for ever to calculate! will be putting the specs on the left hand side and the description on the right, still need to finish fabrics pallets so I can add them according to outfit. There are 6 categories, Intimates, Accessories, Tops, Bottoms, Outer wear and Hosiery. There are a few sub categories within these. Each categorie has a different background, not sure if they are going o be to intense, will turn down at the end once writing and that is on. Will probably have this as a fold out booklet/brochure/thingy majiggy. Not sure if it will be double sided at this point.

Monday 17 October 2011

Almost there!! - Line up

Almost finished finalising line up. I have 6 outfits I'm happy with and am working on 3 more. Some of the garments are featured twice but in different fabrics. I really love how its turning out but it has taken so much time!!
Thought assignment was due on Friday...its due on Thursday!!! ekkkkk

Here's a photo so you can see stuff is happening!!...slowly
also there is a random sock in my line up...just in case

Sunday 16 October 2011

busy rendering

Got 4 days to go and I haven't even started my boards!! Spent all weekend rendering and its taking soo long!!
heres a little peep.
So silly, I have to reshape some of the garments due to the posture of the models. but heather has a bamboo sketch pad..bless her !

Saturday 15 October 2011

Playing with layering

Playing with layering on figures. I think I have too many garments so will edit out a few.

Friday 14 October 2011

Cleaned up figures

Cleaned up the figures, although there are only five and Im doing 8-10 outfits I will just be doubleing 2.


Adding to computer with Penicl and paint

 Printed out rough figures and drew on top with them with pencil and paint. Need to clean up before adding clothes.


Poses for models

Here Im just getting template that I used for specs and roughly manipulating it to create drafts of poses. Will go to uni and print then trace and redraw using soft mediums..still not sure what I am going to do about hair and face...possibley jsut draw??

I wanted to give the models relaxed poses. Thought a few with their arms up would be great for the garments with sleeves however do not know how adjusting the garment to fit will go.

Narrowing down fabric

Chucked everything on bed and had a good look. Im ditching brown knit.

Final fabrics decided. Most of the fabrics are dyed and a few are hand made. The cost of these is made up by the low price of the cotton fabrics.

Thursday 13 October 2011

Playing with outfit arrangements and body

Started putting my garments into outfits. Great way to see what stuff I'm missing and what is working.
Need to design another pair of underwear for far left drawing. Still need to do spec for my one structured garment (corset) and PJ's annddd shawls. Not sure how Ill incorporate the shawls, perhaps ill have the girl holding it or if There is a lack of tops I could have it draped over her front.
I still think I should do my figures in watercolour. After seeing the clothing together I still think it is possible to use them for my final line up because when I do a lose figure with paint or something it will tone down the 'spec side'. Also think I might photograph a face and place it on to give the figure more of a presence.
P.s Ignore the random arm 


Rib Knitting

Learning how to rib knit. I had this in mid for hem bands for knitted garments.

Ribbing gone wrong, did not cast on with pearl,knit,pearl etc

Success! single rows. I can image this one being used as waist band etc with elastic inside.

Double row rib, but muched up top and bottom

Wednesday 12 October 2011

Amazing photo

Just thought I'd post this beautiful photo!. Love the hair scarf!

Fisherman pants

Looking at what Ive designed so far I realised I haven't designed PJ's. Was thinking that for the pants part I might design some thai fisher man pants. These are super comfy, size adjustable tie up pants that I think would be great for lounging about.


Found this sight with PATTERNS!!  ->>>>>>   http://www.mediatinker.com/blog/archives/008262.html

Monday 10 October 2011

Garment layering and fabric added

I am continuing to draw specs and scan in and make into stencils. Tonight I tried putting together an outfit (very rough) and using some of my scanned in fabrics 'colouring' in my garments. It turned out better than I expected as the colours came out soft and watery (using different opacity). I think I will paint my model In water colour , possibly with three varying postures to give a bit of movement to the collection, then scan her in. Am also thinking about her face and possibly taking photos then softly putting it on her.

Here are some pics of tonights layering and fabric testings.


Feeling very nervous about this project at the moment as we have 2 weeks left and have still not had critque or one on ones with teacher -_-.


Also not sure If I will put corset in and if I do if I should make another structured garment?


Thursday 6 October 2011

Early Specification drawings

We were encouraged to get started on spec drawings as we have to put these into a look/catalogue type book at the end. I have started a few garments and find spec drawing a great process for finalising ideas and seeing what they look like to the correct proportions (although still a little long on the legs) To do my spec drawings I picked a model and on one half did the front and on the other the back, I then scanned and in photoshop copyied and mirrored to create full back and front.
I think after doing these I would love to use them along with photoshop fabric rendering in order to produce my final looks. I think this would be a quick and accurate way of finalising my looks. Although the photoshoped, clean lined look is not very in keeping with my theme (fragility and memory) I think in conjunction with more organic backgrounds and possibly a water colour figure, the end look could be both informative and have retain a sense of delicacy and memory.


Tuesday 4 October 2011

Rendering Fabrics (Hand and Photoshop)

As part of my homework I tried 2 different forms of rendering for fabrics. I first tried traditional forms of pencil and paint and collage but I think the resuls were not very realistic, I think this was parcially due to my lack of enthusiasm for hand rendering as my previous colletion was all hand rendered and took alot of time an effort. I then tried photoshopping some of my scanned in fabris onto my early sketches. I think this created a very realitic idea of what these garments would look like in realtiy and If I keep most of my images photoshop based It means I can easly change, layer and duplicate things.

Hand rendering silk, felt and knit. Pretty poor job.


Rendering stithed felt, Using burn tool and masks. I think it looks far to shiny due to light tool and the over colour is very strong, however this could b ue to the current computer im using.

Rendering silk using a mask, burn tool and opacity. I think it is hard to set the opacity correctly as it depends what computer your on to how bright it looks.

Rendering Knit using scanned in hand knint. Split the knit up and duplicated it, also using masks and burn tool.

Monday 3 October 2011

French Kniting

Last night I remembered a child hood Hobie of mine, French Knitting! Where you would usually have a Spool with four spokes at one end which you would wind the yarn around and loop which would create a tube knit! You can put as many spokes as you like too!. Unfortunately I didn't have a Spare spool or nails to make a working contraption so I just tried using my fingers which produced a loose knit , then I tried making a shoddy contraption but because the centre hole was quite big and the spokes where paint brush sticks it didn't produce a tighter knit.


This gave me the idea of possibly doing knitted intimates or taking the tubular knit together to create a fabric surface!


Sunday 2 October 2011

Making 1920's Turban inspired hat

Using the double layered cotton knit I recently purchased I tried to remake a hat of mine that I think will be perfect for the collection as it is casual, warm and 1920's oriental inspired.


Design details of original turban.


Making process.


First trying it on, too loose around edge so am sharpening curve as reduce circumference.


Fixed.


In all I was really please about how it turned out. I think its good as it has a sense of style and era about it while still remaining very simple and neutral. I think If I was to hem this again I would use cover stitch over lock as this would give a clean, quick finish. I would also reduce the circumference a little more so it was tighter.